Bringing Depth to Decor with a 3D Multilayer Letter B
There is something undeniably satisfying about transforming a flat piece of paper into an object that commands attention. When you work with a 3D Multilayer Letter B, you aren't just cutting out a shape; you are engineering depth, shadow, and texture. This technique has taken the crafting world by storm because it bridges the gap between simple silhouette art and complex sculpture, all while remaining accessible to hobbyists with standard cutting machines. Whether you are looking to personalize a nursery, create a striking statement piece for a living room, or craft a unique gift, understanding how these layered files work can unlock a new level of creativity in your projects.
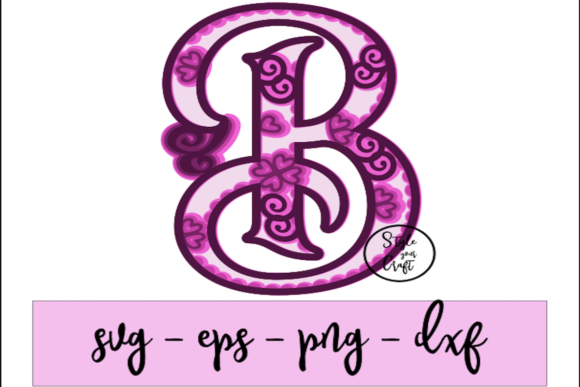
At its core, this design approach relies on stacking multiple copies of the same letter, each slightly offset or colored differently, to create a three-dimensional effect. The specific file we are discussing features five distinct layers, designed originally at 14 cm high by 11 cm wide. This size is ideal for tabletop displays or smaller wall accents, but the beauty of digital cut files lies in their flexibility. You can scale the entire group of aligned layers up or down to fit your specific space. However, a word of caution from experience: if you decide to shrink the design significantly, pay close attention to the thickness of the inner curves and details. Scaling down too much can result in cuts that are too thin to weed or assemble without tearing, especially when working with delicate cardstock.
Real-World Applications Beyond the Craft Room
While the immediate thought might be to frame this for your own home, the utility of a 3D effect layered letter extends far beyond personal decor. Consider the wedding industry, where personalized signage is huge. A large, multi-layered initial of the couple's shared last name can serve as a stunning focal point on a sweetheart table or a welcome sign at the reception entrance. Because the file is downloadable and instant, planners and DIY brides can produce these in bulk or customize colors to match exact Pantone shades of the wedding theme without waiting for shipping.
Educators and daycare providers also find immense value in these designs. Alphabet learning becomes tactile and visually engaging when children can see the depth of the letter "B." Instead of a flat poster, imagine a classroom door decorated with vibrant, stacked letters that cast real shadows as the sun moves across the room. It turns a standard educational tool into an art installation that sparks curiosity. Similarly, real estate agents often use these for "Just Sold" or open house signs. A 3D initial of the street name or the family's surname adds a touch of luxury and permanence to temporary marketing materials, making the property feel more established and inviting.
For small business owners, particularly those selling handmade goods on platforms like Etsy, these files are a goldmine. You aren't selling the digital file itself in this scenario; you are selling the finished product. By cutting these layers from premium materials like textured linen cardstock, velvet paper, or even thin wood veneers (if your machine allows), you can create high-value shadow boxes. The perceived value of a hand-assembled 3D letter is significantly higher than a standard vinyl decal, allowing for better profit margins on custom orders.
Material Choices and Machine Considerations
The versatility of the 3D Multilayer Letter B is heavily dependent on the material you choose. While cardstock is the most popular and forgiving option, not all cardstocks behave the same way. If you are using a standard desktop cutter, the "intricate cardstock" setting is your best friend. These designs often feature tight curves and overlapping sections that require precision. It is not uncommon to need to run the cut twice to ensure the blade goes all the way through, particularly if you are using heavier 80lb or 100lb cardstock which provides a sturdier final product. Always perform a test cut on a scrap piece of your chosen material to verify pressure and blade depth before committing to your good supplies.
Beyond paper, consider the aesthetic impact of different finishes. A monochromatic look—using five shades of the same color, ranging from deep navy to pale sky blue—creates a sophisticated, modern gradient effect perfect for professional offices or minimalist nurseries. Conversely, high-contrast combinations, such as black layers stepping down to white, maximize the shadow effect and make the 3D element pop dramatically against a light wall. Some crafters even experiment with patterned papers, though this requires careful alignment during assembly to ensure the patterns don't clash visually when stacked.
It is important to remember that this is a DOWNLOADABLE file. You will not receive a physical item in the mail. This immediate access is a strength, allowing you to start your project the moment inspiration strikes. However, it also places the responsibility of material sourcing and cutting on you. Ensure you have the appropriate software to handle SVG, DXF, or EPS formats. Most modern cutting machine software accepts these universally, but knowing how to manipulate the groups is key. To resize, simply select all five aligned layers and pull the sizing corner. Maintaining the aspect ratio is crucial to prevent the letter from looking distorted.
Assembly Techniques for Professional Results
The magic of the 3D effect happens during assembly. The general rule of thumb for this specific design is to start with the darkest layer facing down and build up to the lightest layer on top. This mimics natural lighting where shadows are darker underneath objects. To achieve the lift necessary for the 3D look, you cannot simply glue the layers flat against each other. You need spacers.
Glue dots are the industry standard for this task. They provide consistent thickness and strong adhesion without the mess of liquid glue, which can warp paper. Place these spacers strategically between the layers—usually near the center and along the edges where the structure needs support. As you stack each subsequent color, press firmly to ensure the bond holds. If you choose to deviate from the suggested dark-to-light order, perhaps to match a specific brand palette or room decor, keep the structural logic in mind: the bottom-most layer acts as the base shadow, so it should generally be a color that grounds the design.
Once assembled, the options for display are endless. These layered letters are perfectly sized for shadow boxes, which protect the delicate paper edges from dust and damage while enhancing the depth with the box's own recessed frame. Alternatively, they can be mounted directly onto a wall using heavy-duty adhesive strips, creating a floating effect. For door decor, attaching the finished piece to a sturdy backing board ensures it withstands the movement of opening and closing the door without bending.
Navigating Limitations and Design Choices
While the 3D Multilayer Letter B offers fantastic creative potential, it is not without its considerations. The primary limitation is durability. Paper, even heavy cardstock, is susceptible to moisture and direct sunlight. If you plan to place this decor in a bathroom or an area with direct afternoon sun, consider sealing the paper with a matte spray sealant or choosing a UV-resistant cardstock to prevent fading over time. Additionally, because the design relies on precise stacking, it requires a bit of patience. Rushing the assembly can lead to misaligned layers, which breaks the illusion of smooth 3D depth.
Another factor is the complexity of the font style. This particular file is optimized for clean lines, but if you were to adapt this layering technique to a highly script-based or intricate font, the weeding and assembly process would become exponentially harder. The block-style "B" provided in these files strikes a balance between visual interest and constructability, making it suitable for beginners and experts alike.
Ultimately, the value of these cut files lies in their ability to turn a simple initial into a conversation piece. They allow for a level of customization that mass-produced decor simply cannot match. Whether you are a parent wanting to spell out a child's name above their crib, a teacher creating an immersive learning environment, or a designer looking for a quick yet impactful prop, the layered approach offers a practical solution. By understanding the nuances of scaling, material selection, and assembly, you can ensure that your final creation looks professionally crafted and stands the test of time as a beloved part of your space.