Elevate Your Holiday Decor with a Stunning Nutcracker 3D Papercraft Model
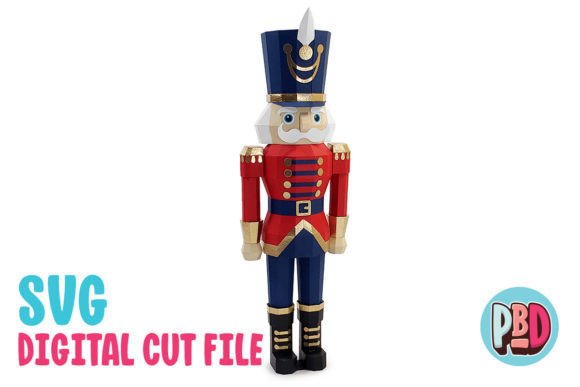
The holiday season often invites us to revisit traditions, but sometimes the best way to honor a classic is to reinvent it. Enter the Nutcracker 3D Papercraft, a creative project that transforms flat sheets of paper into a commanding, 19-inch tall sentinel for your mantel or entryway. Unlike mass-produced plastic figurines that can feel impersonal or fragile, a hand-assembled paper model offers a unique texture and a sense of accomplishment that resonates with creators of all skill levels. Whether you are a seasoned crafter looking for a new challenge or a beginner eager to try something beyond simple ornaments, this project bridges the gap between artistic expression and festive decoration.
However, diving into 3D papercraft without a clear understanding of the materials and digital files involved can lead to frustration. Many enthusiasts rush into cutting and gluing, only to find their final structure wobbly, misaligned, or impossible to assemble. The difference between a shaky prototype and a professional-looking centerpiece often lies in the preparation. By understanding the nuances of cardstock weight, file formats, and assembly techniques, you can ensure your Nutcracker stands tall and proud throughout the holidays.
Choosing the Right Material for Structural Integrity
One of the most common pitfalls in 3D papercraft is underestimating the importance of paper weight. For a model of this stature—measuring 6 inches wide, 4 inches deep, and 19 inches high—standard printer paper simply will not suffice. Using lightweight paper results in a model that collapses under its own weight or loses its geometric definition, making the intricate details of the uniform and facial features look muddy.
To achieve the crisp edges and sturdy form required for this design, you must use 65 lb. cardstock or heavier. This specific weight provides the necessary rigidity to hold the 3D shape without requiring excessive internal bracing, which can complicate the assembly process. If you opt for something lighter, you risk the tabs bending prematurely during gluing, leading to gaps in the seams. Conversely, going too heavy (such as cover stock over 80 lb.) can make folding difficult and cause the paper to crack along the score lines. Always test a single piece of your chosen cardstock by folding a scrap tab; it should hold a sharp crease without snapping.
Navigating Digital File Formats: SVG vs. DXF
In the digital age of crafting, the file format you choose can significantly impact your workflow efficiency. The download package for this project typically includes both SVG and DXF cut files, along with PDF instructions. While it might be tempting to grab whichever file opens first, knowing the distinction is crucial for a smooth experience.
SVG files are generally the superior choice for users with Silhouette Designer Edition (or higher) and Cricut Design Space. These files retain vector data cleanly, ensuring that your cutting machine follows the paths with precision. They load quickly and usually require minimal adjustment before sending to the mat.
On the other hand, DXF files are intended for users with Silhouette Basic Edition. While functional, they come with caveats that often catch beginners off guard. DXF files tend to open slowly in Silhouette Studio and may not appear as clean as their SVG counterparts. More critically, if your software preferences are not configured correctly, the design may import off-center or with broken paths. To avoid this, you must manually adjust your settings: go to Edit Preferences, select Import, change the DXF option from "As-is" to "Centered," and then open the file. Skipping this step often results in a design that is partially cut off or misaligned on your virtual mat, wasting both time and material.
Assembly Strategies for a Professional Finish
Once your pieces are cut, the real work begins. A frequent mistake during assembly is rushing the gluing process. Applying too much adhesive can warp the cardstock, while too little can cause joints to fail over time. The key is patience and precision. Use a fine-tip applicator bottle or a toothpick to apply a thin, even layer of glue to the tabs. Hold each joint in place for a few seconds until the bond sets before moving to the next section.
Another overlooked detail is the order of assembly. Trying to attach the head or arms before the body is fully secured can make the model unwieldy and difficult to manage. Follow the provided PDF instructions sequentially. These guides are designed to build the structural foundation first, ensuring stability as you add complexity. If you deviate from the order, you may find yourself struggling to reach inner tabs or aligning parts at awkward angles.
Enhancing Realism Through Painting and Texturing
While the cardstock provides the form, painting and texturing bring the Nutcracker 3D Papercraft to life. Many builders stop once the glue dries, missing an opportunity to elevate the visual appeal. The instructions included with the download offer valuable tips on how to apply paint without compromising the paper's integrity.
When adding color, avoid saturating the paper, which can cause it to swell or lose its shape. Instead, use dry-brushing techniques or light washes of acrylic paint to highlight raised areas and deepen shadows in the crevices. This approach adds depth and mimics the look of painted wood or metal, enhancing the illusion that this is a traditional wooden soldier rather than a paper model. You might also consider using a matte varnish spray after painting to seal the surface and protect it from dust and humidity, ensuring your decoration lasts for many holiday seasons.
Final Checks Before You Begin
Before you commit to cutting your first sheet, take a moment to review your setup. Ensure your cutting blade is sharp; a dull blade will tear the cardstock rather than slicing through it cleanly, leaving jagged edges that are difficult to glue. Verify that your machine's pressure settings are calibrated for 65 lb. cardstock to prevent incomplete cuts. Finally, extract all files from the ZIP folder before attempting to open them, as trying to access them directly from the compressed archive can lead to corruption or loading errors.
By paying attention to these details, you transform a simple download into a rewarding creative endeavor. The result is not just a decoration, but a testament to your craftsmanship—a 19-inch tall Nutcracker that commands attention and sparks conversation. Whether you are building this for your own home or creating unique inventory for a small business, the investment in proper materials and techniques pays off in the quality of the final product. Embrace the process, respect the materials, and enjoy the satisfaction of building something truly special this holiday season.